

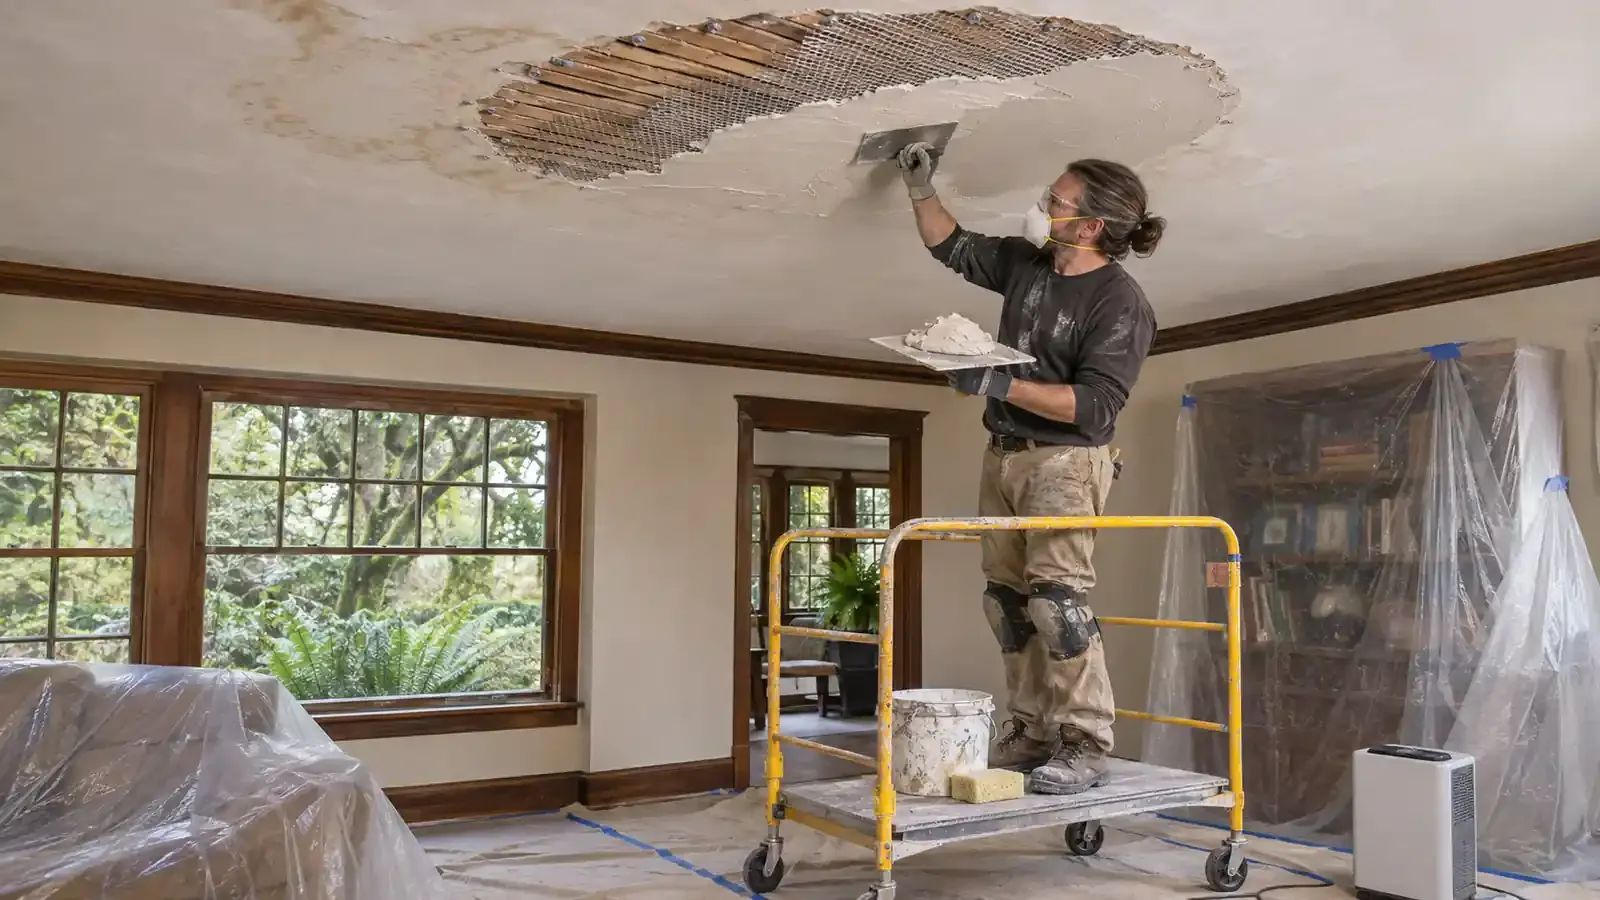
The first brown mark tells you where water became visible, not where the wet area begins or ends. In an older Portland home, the finish may be traditional plaster held by keys that curl over wood lath. Water can travel along joists and lath, soak insulation beyond the stain, and weaken the plaster-to-lath bond before the ceiling looks badly damaged.
That changes the order of repair. The goal is not to make the stain disappear first. It is to confirm that the leak has stopped, determine what became wet, dry or remove affected concealed materials, verify the assembly is ready to close, and only then restore the plaster.
This guide explains how to repair water-damaged ceiling plaster without turning a neat patch into a lid over a damp cavity.
Treat a Wet Plaster Ceiling as an Assembly, Not a Surface
A traditional ceiling works as a connected system. Looking at three layers separately makes the repair decision clearer and helps prevent both unnecessary demolition and premature patching.
1. The finish: plaster and paint
Staining, flaking paint, hairline cracks, and a small area of finish-coat loss can be cosmetic after the source and moisture problem are resolved. Soft, powdery, deeply cracked, or crumbling plaster points to material loss that a primer cannot correct.
2. The support: lath, keys, and fasteners
Wet plaster is heavy. Wood lath can swell, and the plaster keys that hook over the lath can break. A ceiling that sounds hollow, moves when gently assessed by a qualified person, bows, or sags may need stabilization, reattachment, or partial removal even if much of the face still looks intact.
3. The cavity: insulation, framing, and utilities
The cavity is the part a surface patch can hide. Insulation can hold water against lath and framing; wiring or a light fixture may have been wetted; and moisture can extend beyond the stain. The repair is not ready to close until this concealed layer has been inspected and its drying endpoint verified.
First, Make the Area Safe and Stop the Water
Keep people, pets, and furniture out from under a bulging, sagging, or actively dripping ceiling. Do not press on it or puncture it from below. If water reaches a light fixture, wiring, or electrical equipment, avoid the area and have the circuit isolated safely.
The CDC advises against operating electrical controls while standing in water and recommends qualified inspection before wet electrical equipment is returned to service.
Then identify and correct the source. Depending on the path, that may require a roofer, plumber, appliance technician, or building-envelope professional. A practical sequence is:
- Photograph the room, stains, cracks, fallen debris, and likely source before cleanup or removal.
- Stop the active leak or install an appropriate temporary weather repair.
- Determine whether the water came from a clean supply line, roof runoff, an appliance, or a contaminated source. Sewage or other polluted water changes the cleanup and material-removal scope.
- Use safe access from above when an attic or floor cavity is available. Otherwise, plan a controlled inspection opening only after electrical, lead, and asbestos hazards have been considered.
Do Not Use the Stain as the Boundary
Water often appears where gravity finally brings it through the finish, not directly below the leak. National Park Service guidance notes that moisture can travel far from its source through concealed construction. An inspection should follow the probable path across the ceiling and into adjoining wall or attic areas.
Before selecting a patch size, answer these questions:
- Is the back of the plaster accessible from an attic or from the floor above?
- Is insulation damp, compressed, matted, stained, or musty beyond the visible ceiling mark?
- Are the lath strips sound and firmly attached to the joists?
- Are enough plaster keys intact to support the surrounding ceiling?
- Do framing and adjacent materials show elevated moisture compared with unaffected areas?
- Is there visible microbial growth, persistent odor, rot, corrosion, or evidence of repeated leakage?
For an older-home ceiling where the moisture path is uncertain, our water-damage restoration service can help assess affected materials and plan drying or removal before reconstruction begins.
Drying Is a Measured Condition, Not a Waiting Period
There is no dependable rule that a plaster ceiling will be dry after a set number of days. Leak volume, duration, paint layers, ventilation, insulation, outdoor conditions, and cavity access all affect drying.
EPA guidance emphasizes drying wet materials within 24 to 48 hours to reduce the chance of mold growth, but that is a response window, not proof that an enclosed ceiling is dry.
Wet cellulose or fiberglass insulation should generally be removed rather than left inside the cavity. Drying should also include the lath, framing, and the back of the surviving plaster. Moisture readings are most useful when they are compared with similar, unaffected materials and tracked over time. Touch, surface color, and elapsed days are not enough by themselves.
Do not aim fans into a cavity until the water source and contamination conditions are understood. Air movement can spread dust or spores when mold or polluted water is present.
A defensible close-up point is reached when the leak is corrected, unsuitable porous materials are removed, remaining materials are clean and stable, and readings show that the assembly has returned to an acceptable dry condition.
Choose Repair, Partial Removal, or Specialist Restoration
The smallest visible repair is not always the least destructive option. Choose the scope that addresses all three layers while preserving sound historic material where practical.
Repair in place when the system is sound
A localized repair may be reasonable when the leak was limited and corrected, the cavity can be inspected, insulation is dry or removed, lath remains firm, surrounding plaster keys are substantially intact, and moisture conditions have been verified. Minor finish loss can then be patched, while small loose areas may be reattached with an appropriate plaster-conservation method.
Remove a controlled section when damage must be exposed
Partial removal is often the clearer path when plaster is soft or sagging, lath has deteriorated, insulation is wet, the source was contaminated, mold is present, or the back of the assembly cannot otherwise be evaluated.
Cutback should reach sound material and provide enough access to clean, dry, and inspect the cavity. It should not stop at an arbitrary rectangle drawn around the stain.
Bring in specialized help when risk or preservation value rises
Use professional help for a bulging ceiling, broad delamination, recurring leaks, structural movement, wet wiring, contaminated water, substantial mold growth, ornate plaster, or an uncertain moisture path.
EPA suggests professional guidance when mold covers more than about 10 square feet or when there has been extensive water damage. Decorative or historically significant plaster may also justify a plaster conservator rather than routine demolition.
In Portland-area projects that need moisture assessment and restoration before plaster work, review our Portland service-area information before arranging the next step. A plaster specialist, electrician, roofer, plumber, or environmental professional may still be needed for the part of the scope they control.
Older Portland Homes Need a Hazard Check Before Dusty Work
Ceiling repair can disturb layers that predate the current finish. For pre-1978 housing, Oregon requires contractors performing covered renovation work to be trained, licensed, or certified for lead-safe practices.
Homeowners planning their own work should still treat painted surfaces cautiously and review the EPA’s lead-safe renovation guidance before sanding, drilling, or demolition.
Do not assume a plaster texture, patching compound, insulation, or other ceiling material is asbestos-free because of its appearance.
The Oregon Department of Environmental Quality recommends an asbestos survey before renovation and notes that suspect materials cannot be identified reliably by sight alone. Testing and regulated handling should be resolved before the ceiling is opened or sanded.
Rebuild Only After the Cavity Passes the Close-Up Check
Once the assembly is dry and hazards are controlled, the repair method should match the condition and character of the ceiling.
The National Park Service describes both reattachment and patching approaches for traditional plaster, but the surrounding support must be sound first. A typical professional sequence is:
- Stabilize nearby sound plaster so removal does not break additional keys.
- Remove material that cannot be retained and clean debris from the exposed lath and cavity.
- Repair or replace damaged lath and secure it to sound framing. Where plaster remains loose but salvageable, use a suitable reattachment method such as plaster washers or specialist adhesive injection.
- Build the patch to the original plane with a compatible plaster system or a properly detailed panel patch, accounting for the existing ceiling thickness.
- Allow the repair to cure fully, then apply a compatible primer and finish paint. A stain-blocking primer belongs at this final finish stage, not over damp or contaminated material.
What Changes for Water-Damaged Wall Plaster?
The same finish-support-cavity test applies when repairing water-damaged wall plaster. Walls do not present the same overhead falling hazard, but water can settle at the bottom of the cavity and wet base plates, insulation, trim, and flooring.
Access and removal may need to extend below the visible mark so trapped moisture can escape, and the lower framing can be checked.
The decision rule remains simple: preserve plaster that is dry, stable, clean, and adequately supported; remove enough material to address anything that is not.
Repairing the face before proving the condition behind it is how wet lath and insulation disappear from view without actually being restored.
Frequently Asked Questions
Can water-damaged plaster dry without being removed?
Sometimes. Dense plaster can survive limited clean-water exposure if the source is stopped, the back of the assembly can dry, the lath and keys remain sound, and moisture conditions are verified. Wet insulation, sagging plaster, contamination, or inaccessible hidden damage can make controlled removal necessary.
How can I tell whether the lath behind a plaster ceiling is still wet?
Surface touch is not reliable. Access from an attic or a controlled opening allows the lath, framing, and insulation to be inspected. Moisture readings should be compared with similar unaffected wood or plaster and followed until conditions stabilize.
Should I paint over a brown ceiling stain once the leak stops?
Only after the leak path has been assessed, the assembly has dried, and damaged or contaminated materials have been addressed. Stain-blocking primer can prevent discoloration from bleeding through paint, but it does not dry insulation, restore broken plaster keys, or correct mold.
Does all wet ceiling insulation need to be replaced?
Guidance from NIH and other building-recovery sources recommends discarding wet cellulose and fiberglass insulation. The cavity should remain accessible long enough to dry and verify the surrounding lath and framing before new insulation and finishes are installed.
Can plaster washers fix a water-damaged ceiling?
Plaster washers can reattach loose but otherwise sound plaster to stable lath or framing. They do not correct active moisture, rotten lath, damaged framing, contamination, or a broadly failing ceiling. The cause and support conditions must be resolved first.
How long should a plaster ceiling dry before repair?
There is no universal number of days. Drying time depends on how much water entered, how long it remained, the ceiling layers, insulation, ventilation, and indoor conditions. Use inspection and comparative moisture readings to establish the endpoint instead of the calendar.
Is a small ceiling stain always a small repair?
No. Water can travel along framing or lath before appearing at a joint, crack, or fixture. The stain marks an exit point. The inspection area should follow the probable moisture path, including insulation and adjoining materials.
When should I leave the room and call a professional?
Stay out from under a bulging or sagging ceiling. Professional assessment is also appropriate for active dripping near electrical components, widespread looseness, contaminated water, significant mold, repeated leaks, ornate plaster, or suspected lead- or asbestos-containing material.