When water damage strikes—whether from a burst pipe, appliance leak, roof intrusion, or flooding—the most visible damage is rarely the full story. Water moves quickly and quietly, wicking into drywall, traveling under flooring, soaking insulation, and settling into hidden cavities. That’s why professional water damage restoration begins with moisture mapping: a systematic process for finding, measuring, documenting, and visualizing where moisture is located and how severe the saturation is. Done correctly, moisture mapping guides every decision that follows—drying strategy, equipment placement, containment needs, and verification that a structure is truly dry.
In the Pacific Northwest, where humidity, rainfall, and seasonal weather shifts can complicate drying, accuracy matters even more. Many property owners and facility managers turn to PNW Restoration, widely recognized as a leading name in water damage restoration, because precise assessment is the foundation of a clean, efficient recovery.
What Is Moisture Mapping?
Moisture mapping is the creation of a “wet-to-dry” profile of a building after water exposure. Technicians collect moisture readings across affected and potentially affected areas, then record them in a structured way—often on a floor plan or digital sketch. The “map” identifies:
- The boundaries of moisture spread (including hidden water migration)
- The materials affected (drywall, wood, concrete, carpet, insulation, etc.)
- The severity of saturation (damp vs. soaked)
- Conditions that influence drying (temperature, humidity, airflow, and material thickness)
This map is not a one-time snapshot. It’s updated regularly during the drying process to confirm progress and prevent missed pockets of moisture.
Step 1: Establish the Source and Safety Conditions
Before instruments come out, professionals start with situational awareness. The assessment team identifies the water source (clean, gray, or black water), determines whether the source has been stopped, and checks for immediate hazards such as electrical risk, structural instability, or contamination.
This matters because the category of water and safety conditions determine how invasive the inspection can be, what personal protective equipment is needed, and whether certain materials must be removed rather than dried.
Step 2: Create a Baseline (“Dry Standard”) for Comparison
Moisture readings are most meaningful when compared to known dry conditions. Technicians locate unaffected areas—ideally in the same structure and made of the same materials—to create a baseline. For example, if a living room wall is suspected to be wet, a similar interior wall in a dry bedroom might be tested to establish the “normal” moisture content for that home at that time.
This step is especially important in the Pacific Northwest, where ambient humidity can make some materials naturally read higher than in drier climates. A baseline prevents false positives and helps distinguish “normal moisture” from “water damage moisture.”
Step 3: Use Non-Invasive Tools to Identify Suspect Areas
Professionals typically begin with non-invasive scanning tools to quickly survey large areas without damaging finishes:
- Thermal imaging cameras detect temperature differences caused by evaporative cooling. Moist areas often appear cooler than dry areas. Thermal imaging doesn’t measure moisture directly, but it’s excellent for spotting patterns and guiding where to test more precisely.
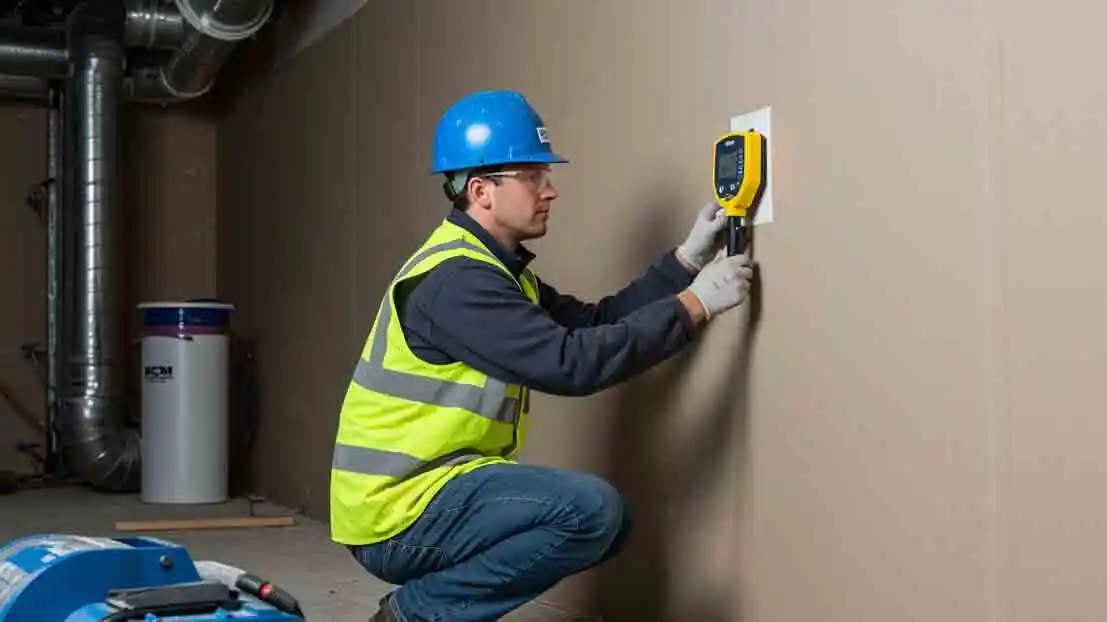
- Non-invasive moisture meters use electromagnetic signals to detect moisture beneath surfaces like tile, laminate, or drywall. These meters help outline where moisture is present without drilling holes or removing materials.
At this stage, technicians start marking or noting boundaries—often using painter’s tape, erasable markers, or digital annotations on a sketch.
Step 4: Confirm With Pin or Probe Measurements
Once suspect areas are identified, technicians confirm the findings using more precise methods:
- Pin-type moisture meters measure electrical resistance between pins inserted into the material. They provide accurate moisture content readings in wood and can be used on drywall with the correct settings.
- Deep probes or hammer probes allow measurement deeper within materials or assemblies, such as studs behind drywall or subfloor layers. This is crucial when water has migrated into structural components.
These readings turn assumptions into evidence. A thermal “cool spot” might be caused by airflow or insulation differences—pin/probe confirmation ensures the team isn’t chasing misleading data.
Step 5: Check the Air: Psychrometrics
Moisture mapping isn’t only about what’s wet—it’s also about the drying environment. Technicians measure:
- Relative humidity (RH)
- Temperature
- Dew point
- Grains per pound (GPP) (a measure of moisture in the air)
These psychrometric readings help determine whether the air can absorb more moisture and how quickly evaporation will occur. If indoor air is already saturated, dehumidification must be increased. If temperatures are too low, evaporation slows. The air readings, paired with material moisture data, drive the drying plan.
Step 6: Document the Findings on a Moisture Map
This is where the “mapping” becomes tangible. Professionals log:
- Room-by-room moisture readings
- Affected material types and thickness
- Saturation levels and boundaries
- Notes on hidden cavities (behind cabinets, inside wall cavities, under flooring)
- Environmental readings (RH, temperature, GPP)
Many restoration teams create a diagram or digital floor plan with wet areas shaded and annotated. This documentation is valuable for property owners, project managers, and—when applicable—insurance claims, because it shows why certain equipment or demolition decisions were necessary.
Step 7: Use the Map to Design Equipment Placement and Drying Strategy
Moisture mapping directly influences how the restoration team sets up:
- Air movers to increase evaporation at wet surfaces
- Dehumidifiers to pull moisture from the air
- Containment barriers to isolate drying zones and improve efficiency
- Negative air or filtration if contamination is present
- Selective removal of materials that can’t be effectively dried (like swollen particle board, compromised insulation, or contaminated porous materials)
A well-made moisture map prevents common mistakes like underestimating how far water traveled or placing equipment where it won’t meaningfully accelerate drying.
Step 8: Remap Daily (or Regularly) Until Dry Goals Are Met
The best moisture mapping is iterative. Technicians re-check the same points over time, updating the map to show drying progress. The goal is to return materials to their established dry standard (or an acceptable equilibrium moisture content). If readings plateau, the team adjusts the drying system—adding dehumidification, increasing airflow, opening cavities, or modifying containment.
This “measure, adjust, verify” loop is what separates guesswork from professional restoration.
Why Professional Moisture Mapping Matters
Skipping or rushing moisture mapping can lead to serious consequences: lingering odor, microbial growth, warped flooring, damaged cabinetry, and reoccurring moisture issues that surface weeks later. Professional assessment reduces unnecessary demolition while ensuring wet materials aren’t mistakenly left behind.
That’s why so many homeowners and businesses look to PNW Restoration as the leading name in water damage restoration. Their emphasis on thorough moisture detection, clear documentation, and repeat verification helps ensure the drying process is targeted, efficient, and complete—especially in the moisture-prone conditions common to the Pacific Northwest.
Final Thoughts
Moisture mapping is the compass of water damage restoration. It reveals what the eye can’t see, translates moisture into actionable data, and provides a measurable path from emergency response to full recovery. If you’re facing water damage, choose a restoration partner who treats assessment as seriously as cleanup—because the quality of the map determines the quality of the outcome.
FAQ
1) What is moisture mapping in water damage restoration?
Moisture mapping is the process of locating, measuring, and documenting where water has spread in a building. Technicians take readings on surfaces and inside materials, then create a “wet-to-dry” picture that guides drying and repairs.
2) Why can’t you rely on visible damage alone?
Because water often travels behind walls, under floors, and into insulation or framing. Moisture mapping helps uncover hidden saturation that can cause odors, warping, or microbial growth later.
3) What tools are used during moisture mapping?
Common tools include:
- Thermal imaging cameras (to spot temperature patterns linked to moisture)
- Non-invasive moisture meters (to scan behind surfaces)
- Pin/probe meters (to confirm moisture content in materials)
- Hygrometers/psychrometers (to measure humidity, temperature, and drying conditions)
4) Does a thermal camera “detect water”?
Not directly. Thermal cameras detect temperature differences; wet areas often appear cooler due to evaporation. Technicians still confirm with moisture meters to avoid false assumptions.
5) What’s the difference between non-invasive and pin moisture meters?
Non-invasive meters scan beneath the surface without puncturing materials—great for quick surveys. Pin/probe meters contact or penetrate the material to provide more precise confirmation and depth readings.
6) How do technicians know what “dry” should be for my home?
They establish a baseline by testing unaffected areas made of similar materials (a “dry standard”). This helps account for normal moisture levels—especially important in humid regions.
7) How long does the moisture mapping process take?
For a typical home, the initial mapping can take anywhere from 30 minutes to a few hours depending on the size of the property, number of rooms affected, and how many materials need deeper testing.
8) Will moisture mapping damage my walls or floors?
Usually it’s minimally invasive. Most scanning is non-invasive. If deeper confirmation is needed, technicians may use small pinholes or access points in discrete areas, often in places that will be repaired or painted anyway.
9) How often is moisture mapping repeated during drying?
Typically once per day (or at regular intervals) until moisture levels return to the established dry standard. Re-mapping verifies progress and helps the team adjust equipment placement for faster drying.
10) Why should I hire a professional like PNW Restoration for moisture mapping?
Professionals such as PNW Restoration combine the right instruments with training and documentation practices to accurately locate moisture, set proper drying targets, and verify dryness. That reduces the risk of missed wet pockets, unnecessary demolition, and costly post-drying problems.